
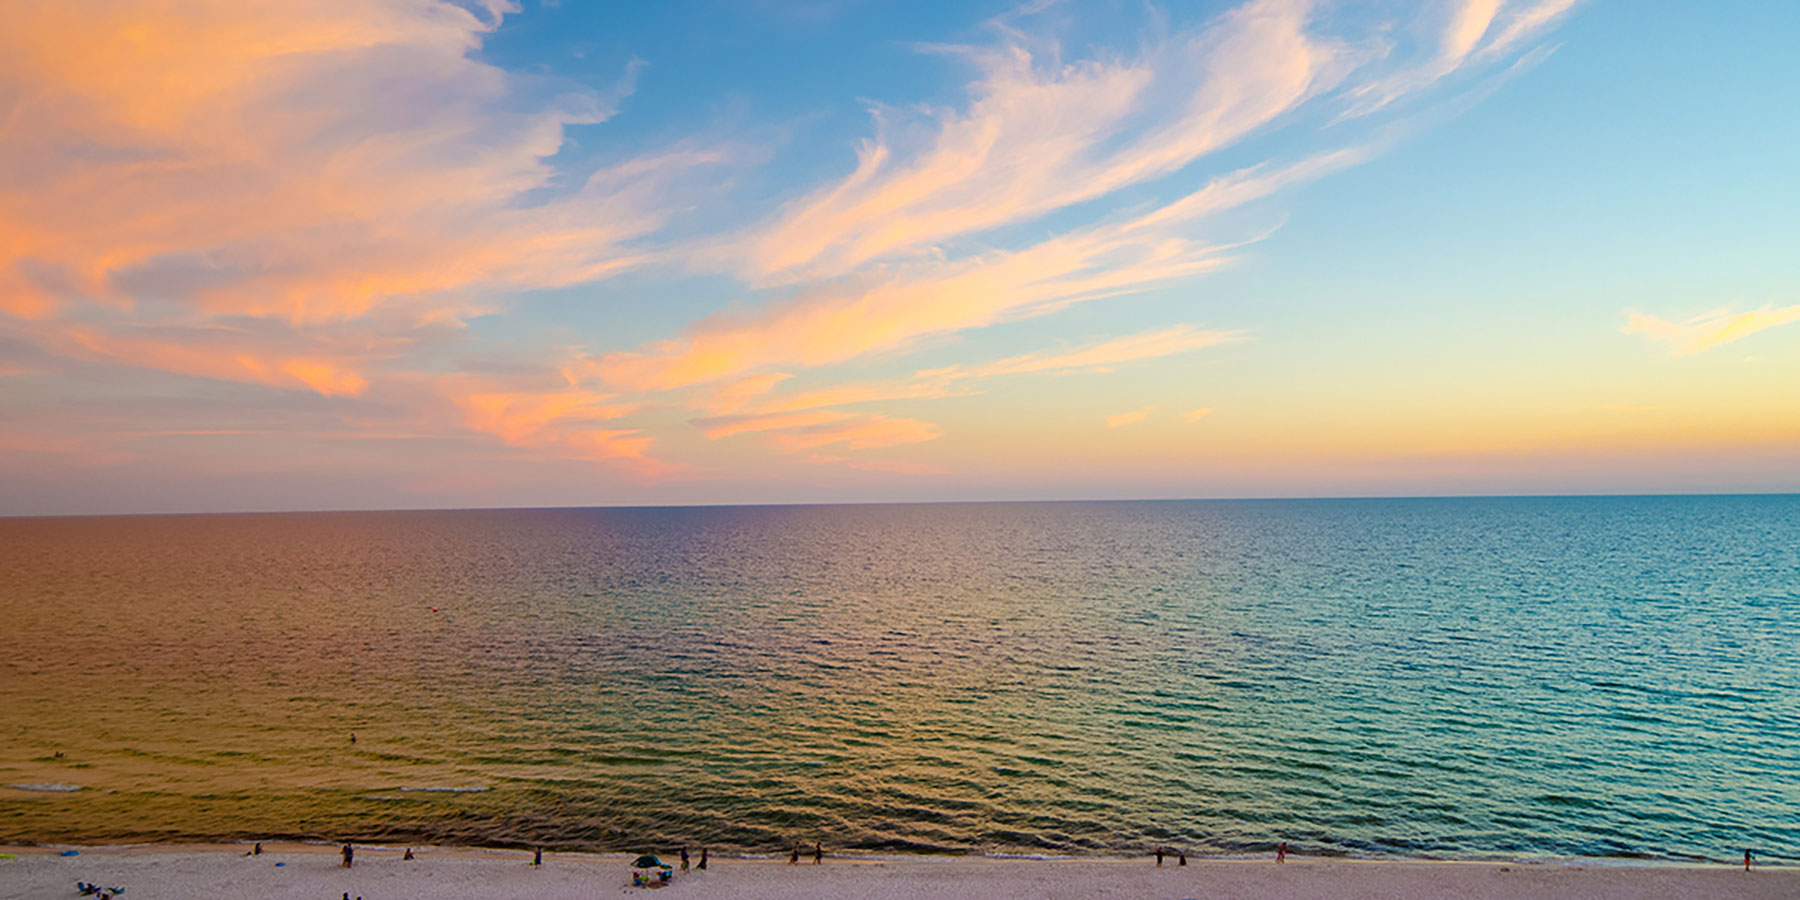
12 Best Family Beach Activities for Any Age
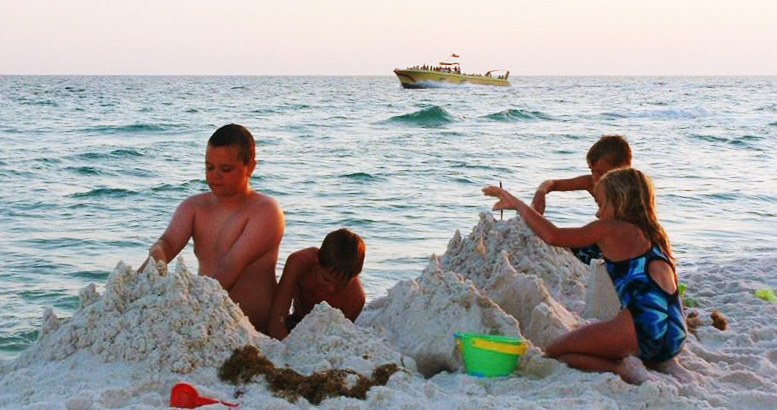
The first hour on the sand is great fun. Everyone arrives rested and ready for new adventures. Give children a simple mission before the snacks come out and they need water to re-hydrate. The best family beach activities mix movement, imagination, and enough downtime to keep everyone happy all day.
Panama City Beach gives families wide stretches of soft, white sand and clear Gulf water, but each day brings different wind, surf, heat, and crowd levels. A flexible plan works better than trying to force a packed schedule. Choose a few activities, keep drinking water, snacks, and shade close, and let the conditions guide the day.
Best Family Beach Activities for a Full Beach Day
1. Build a Sandcastle With a Real Plan
A bucket-and-shovel project becomes more engaging when everyone takes a job. One person gathers wet sand from near the waterline, another packs towers, and younger children can decorate the finished structure with shells, seaweed, and small driftwood pieces.
Set a theme before you begin: a coastal fort, a sea turtle habitat, or a miniature version of the family's vacation rental. Dig shallow moats only, and fill them before leaving. Deep holes create hazards for beach walkers and wildlife, especially after the light fades.
2. Run a Shoreline Scavenger Hunt
A scavenger hunt gives children a reason to look closely at the beach instead of asking for a new activity every ten minutes. Ask them to find, rather than collect, a feather, a shell with ridges, a tiny piece of seaweed, a crab track, and something with a natural spiral.
Keep the search respectful. Leave live creatures where you find them, avoid nesting areas, and do not disturb shorebirds. Photos work better than souvenirs for unusual finds, and they give families a record of the small details that made the day memorable.
3. Host a Family Sand Art Contest
Not every beach game needs running or swimming. Use hands, sticks, and beach-safe objects to create a sea turtle, a large family initial, or an underwater scene in the sand. Give each person 20 minutes and let another family member serve as the judge.
This activity works especially well during the hottest part of the afternoon, when children need a break from the water but are not ready to go in just yet. A simple category such as funniest design, most creative use of shells, or best teamwork keeps the competition light.
4. Play Water Relay Games at the Water's Edge
The gentle wash zone can deliver plenty of fun when the beach flag conditions allow water play. Try a bucket relay, where teams carry small amounts of water to fill a line drawn in the sand, or a sponge toss using a soft, wet sponge and clear personal space.
Adults should stay close enough to supervise every child near the Gulf. Skip relay games when waves build, currents strengthen, or the beach becomes crowded. The point is to create easy laughter, not to push farther into the water.
5. Fly a Kite When the Wind Cooperates
A beach breeze can turn an ordinary afternoon into a family event. Bring a simple kite with a short, manageable line and choose an open area well away from umbrellas, dunes, power lines, and other guests. Younger children can help launch the kite or hold the spool with an adult.
Wind makes all the difference. Too little wind leaves a kite dragging through the sand, while strong gusts make control difficult. If conditions do not cooperate, turn the attempt into a quick lesson about wind direction, then move on without making it a battle.
6. Make a Beach Olympics Course
Create a short course with clear start and finish points. Families can race crab-walk style, toss a ball into a bucket, balance a shell on a shovel, or walk backward across a small section of packed sand. Keep the course away from the waterline and other guests.
Focus on challenges that suit different ages and abilities. A toddler might carry a beach toy, while older children can time a sprint or complete two activities in sequence. The best version rewards cheering and teamwork as much as speed.
7. Take a Guided Nature Walk Without Leaving the Beach
The shoreline changes throughout the day. Walk it slowly with children and point out bird tracks, coquina shells, ghost crab holes, sea foam, and the line where waves deposit natural material. Early morning often offers cooler temperatures and fewer footprints.
Use the walk to explain that the beach supports more than vacation fun. Dunes help protect the coast, shorebirds need room to feed, and sea turtles require dark, unobstructed nesting areas. Families can enjoy the landscape while protecting the features that make it special.
8. Try Paddle Ball or Catch on Firm Sand
A paddle ball set, soft foam ball, or beach-friendly football offers an easy activity for mixed-age groups. Choose packed sand where players can move more comfortably, and create a boundary that leaves room for people walking along the shore.
Keep expectations realistic. Wind changes the path of every throw, and soft sand makes quick turns harder than they look. Those challenges often make the game more entertaining, especially when adults join rather than watch from a chair.
9. Set Up a Reading and Coloring Break
A family beach day does not need constant action. Pack a few picture books, a notebook, colored pencils, or a simple travel game for a shaded break. This quiet hour helps younger children reset and gives adults time to breathe without ending the day early.
Choose materials that can handle sand and avoid leaving paper or small plastic pieces behind. A zippered pouch keeps supplies organized, and a towel spread under a canopy creates a defined space for calmer activities.
10. Watch the Water With a Safety-First Challenge
Turn water awareness into a family habit. Ask older children to help identify the lifeguard station, notice the beach warning flags, and point out where the waves break. Explain that conditions can change quickly, even on a sunny day.
Adults should make the final call on swimming. Red flags, rough surf, lightning, strong currents, or a child who feels tired all change the plan. A good beach day does not depend on getting in the water. Building, walking, and playing on dry sand still count toward a great beach day.
11. Plan a Sunset Photo Mission
Late-day light makes family photos look warmer, and sunset gives children a natural finish line after hours of play. Give each child a photo assignment: capture a footprint pattern, a shell close-up, a silhouette, or a favorite beach toy against the sky.
Keep phones and cameras protected from sand, and stay aware of the changing light. Families should begin packing before darkness settles, especially if they need to walk across a large beach access area or return to a vacation rental with tired children.
12. End With a Five-Minute Beach Reset
Before heading back, make cleanup a shared responsibility. Pick up every item your group brought, shake out towels away from other guests, and check the sand around chairs, toys, and umbrellas. Children can take pride in finding the last stray snack wrapper or toy shovel.
This final habit protects the shoreline and makes the next morning easier. It also prevents the common vacation problem of arriving back at the vacation rental without a favorite sandal, phone, or stuffed animal.
How to Choose Activities for Your Family
Age, energy level, and weather matter more than a long activity list. Young children usually do best with short blocks of play and frequent shade breaks. Tweens may prefer games with a score, a challenge, or a little independence within clear boundaries. Teenagers often engage when adults invite them into a game without turning it into a requirement.
Bring the basics that support a longer, more comfortable beach day: water, broad-spectrum sunscreen, hats, shade, snacks, towels, and a small first-aid kit. Reapply sunscreen as directed, drink water before anyone feels thirsty, and give children a chance to cool down before they become overheated.
A rental close to the beach can make these pauses much easier. Families can return for lunch, rest during peak heat, and come back out when the sand cools. That rhythm often creates a better vacation than trying to stay on the beach from morning until night.
The most successful beach day rarely follows a strict itinerary. Start with one activity that gets everyone moving, save a quieter option for the hottest hours, and leave room for the unplanned moments - the perfect shell, the first kite launch, or a child who decides the sandcastle needs one more tower.
Best Trips to Shell Island From Panama City Beach
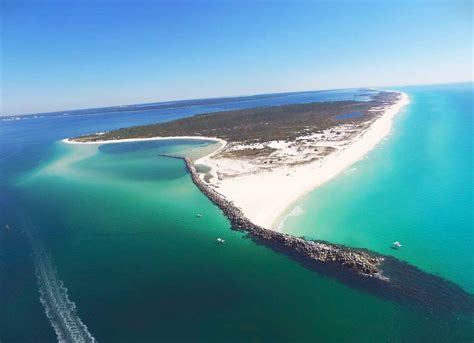
Shell Island is a very special beach in Panama City Beach that you can't reach by following a crowded boardwalk. The seven-mile barrier island is just across St. Andrews Bay from Panama City Beach, with wide stretches of undeveloped sand, clear Gulf water, and a shoreline that changes with the tide. The best trips to Shell Island leave plenty of time to enjoy this amazing place. It's not just another thing to check off your vacation list so plan to spend the day there!
Planning a successful visit depends on you and your group. You'll need to decide the best way for you to get there, when the best time to go will be based on local weather forecasts and what to bring to maximize your fun in a setting with very few conveniences. Families with young children will need to have a different plan than couples looking for a quiet afternoon or experienced boaters who want to set their own schedule.
Choose the Shell Island Trip That Fits Your Day
There is no single best boat trip for every guest. Your group size, comfort level, budget, and desired time on the sand should shape the decision.
You can find most of the local transportation out to Shell Island on line by simply searching Shell Island Panama City Beach, FL. Read the listings to see what will work best for your group, your schedule and your budget.
Shuttle service for a simple, independent visit
A passenger Shell Island shuttle is a practical option for visitors who aren't interested in operating their own rental boat. It provides transportation from the mainland to Shell Island, then allows guests to spend their time swimming, shelling, walking the beach, or relaxing before the return departure.
This option works well for families and first-time visitors because the logistics of the trip are handled by the pros and are very straightforward. The trade-off is timing. You'll have to work within a set schedule, and a missed departure can turn an easy beach day into an expensive problem. Confirm departure times before you leave, arrive early, and keep an eye on the clock while you are on the island.
Private charter for flexibility and local guidance
A private charter makes sense when your group wants more control over the day. A professional captain can tailor your route around water conditions and may incorporate sightseeing in St. Andrews Bay, dolphin viewing, or time at a quieter section of the island as well.
Charters cost more than a shuttle, but they can offer better value for a larger family or group. They also reduce the pressure of having to watch the clock for your departure time, navigating unfamiliar water, etc. Before you go, be sure to know what the charter includes, how long you will have on the island, and whether the captain provides beach equipment, drinking water, or snorkeling gear. Clear expectations prevent surprises at the dock.
Pontoon rental for confident boaters
A pontoon rental creates the most flexible schedule for qualified, comfortable boaters. You can leave early, bring your own cooler and gear, and explore at a pace that suits your group. It can be an excellent choice when weather and water conditions are calm. The pontoon rental operator will explain the route, navigation markers, no-wake areas, and return procedures before you head out.
This option also carries the most responsibility for you as the operator of the boat. Wind can build up quickly in the afternoon, and bay conditions can change. The captain of the boat must stay alert, follow posted rules, wear or provide required safety equipment, and avoid alcohol while operating. If you feel uncertain about handling a vessel, choose a shuttle or charter instead.
Time Your Visit Around Weather, Water, and Crowds
When visiting Shell Island it's best to get an early start. Morning trips offer cooler temperatures, fewer people, and more time to pick out a good location on the beach. The summer sun is much stronger in the afternoon so, you may wish to head back before the highest heat of the day. Keep an eye on the weather as you plan your visit. During busy summer weeks, early departures also help you avoid the most crowded shuttle times.
Wind direction matters as much as the forecast icon on your phone. A bright, sunny day can still produce choppy water, strong currents, or uncomfortable conditions near the Gulf side of the island. Check the local marine forecast on the morning of your trip and listen to the guidance of your captain, rental operator, or shuttle crew. They work around these waters regularly and may adjust plans for good reason.
Spring and fall often offer pleasant temperatures with less intense summer heat, though water temperatures and weather patterns vary. Summer brings warm water and a lively beach atmosphere, but it also brings afternoon storms, higher humidity, and heavier boat traffic. Winter visitors may find peaceful walks and striking coastal scenery, even when swimming in the cooler water is not as appealing.
If you want calmer bay water for younger children, ask your boat operator where conditions look best that day. The Gulf side can look inviting, but waves and currents can make it less suitable for inexperienced swimmers. No photo is worth ignoring a posted warning and putting anyone in danger.
What to Bring for a Comfortable Island Day
Shell Island's undeveloped character is really the reason many people visit the island. This means you need to arrive prepared. Do not assume you will find food, shade, restrooms, or supplies once you step ashore. Pack for a day on a remote beach without commercial services available.
Bring plenty of drinking water, snacks, sunscreen, hats, and a beach umbrella or other portable shade. Sandals or water shoes help with hot sand, shells, and uneven spots near the waterline. A dry bag protects phones, keys, medications, and travel documents from spray and sand.
For families, add floatation devices appropriate for each child, towels, a change of clothes, and more water than you think you will need. Keep children close by in the water, even on calm days. Conditions can shift, and there are no lifeguards stationed on the island.
If shelling ranks high on your list, bring a small mesh bag and look carefully rather than rushing. The shoreline can hold beautiful finds as the tides change, but visitors should respect posted regulations and avoid disturbing living creatures. Do not pick up live starfish or other creatures. Leave them be to live their lives. Leave the island cleaner than you found it by carrying out every wrapper, bottle, and piece of beach gear.
Make Space for the Island's Natural Side
Shell Island gives visitors an up close look at a coastal area that remains largely undeveloped. Sea oats wave across the dunes, shorebirds peruse the waterline for snacks, and the bay can reveal fish, rays, or dolphins from a respectful distance. This is so much more than just another sunny afternoon on your vacation.
Stay off protected dunes and marked nesting areas. Dunes serve as a natural defense against erosion, and nesting wildlife needs space to rest and reproduce. Keep a generous distance from animals, never feed them, and secure food so it does not attract birds or other wildlife.
Snorkeling can be worthwhile when water clarity and conditions are favorable, especially near areas with submerged structure or calmer water. Treat snorkeling as a bonus rather than a guarantee. Visibility changes with wind, wave action, and recent weather, so a mask in your beach bag gives you an option if the perfect conditions arise.
Plan the Rest of the Day, Too
Your Shell Island visit will be the highlight on one vacation day. Build in time before departure to park, check in, use restrooms, and load gear. Afterward, expect sand in every bag, tired children, and hungry adults. Keep the evening schedule flexible so everyone can relax and reflect on the day's amazing sights and sounds.
Guests staying in Panama City Beach can make the trip easier by preparing coolers, towels, and bags the night before. A professionally managed vacation rental gives your group a dependable place to rinse off, recharge, and enjoy the rest of the day together.
Before you commit to any boat trip, confirm the operator's weather policy, cancellation terms, passenger limits, and what happens if conditions change after departure. These details matter most when storms threaten or your group includes small children, older relatives, or guests with limited mobility.
Shell Island does not need a complicated itinerary. Give it time, respect the water, and bring what you need. Then let the open beach, salt air, and quiet stretches of shoreline do what crowded attractions cannot.
Where to Find the Best Sea Shells in PCB
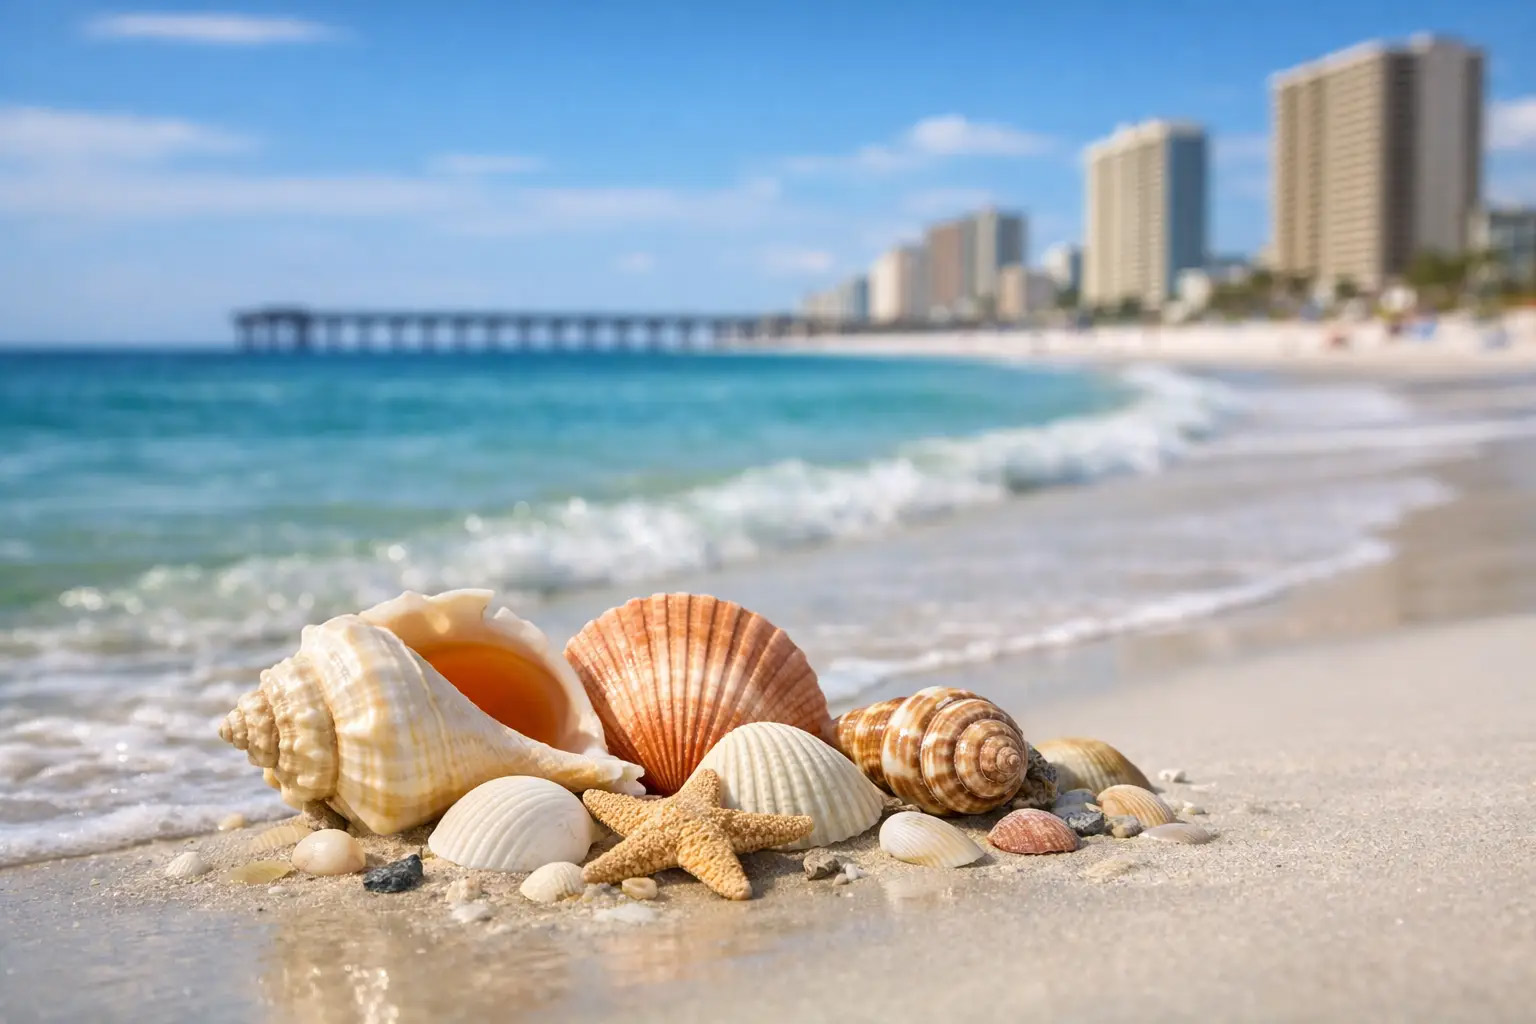
The Gulf does not put its best shells on display at noon on a crowded summer day. It delivers them after shifting tides, overnight wind, and changing surf. If you are wondering where to find the best sea shells in PCB, start with timing as much as location. A quiet walk shortly after low tide can turn an ordinary stretch of sand into a memorable family beach activity.
Panama City Beach offers miles of shoreline, but shelling conditions vary from one beach access to the next. The best plan combines a promising location, a low-tide window, patience, and respect for the beach ecosystem. A few well-chosen shells make a better keepsake than a bag filled in a hurry.
Where to Find the Best Sea Shells in PCB
St. Andrews State Park
St. Andrews State Park remains one of the strongest choices for guests who want more than a quick scan along the main beach. Its location near the eastern end of Panama City Beach brings together Gulf water, protected shoreline, and areas where currents can leave behind shell fragments and whole shells. Walk the wrack line - the natural band of seaweed, driftwood, and small debris left by the tide - rather than focusing only on dry, powdery sand.
Early morning often works best here, especially after a night of gentle surf. Look carefully near the waterline for scallop shells, coquina shells, augers, moon snails, and small whelks. Conditions change each day, so a productive area one morning may look bare the next.
The park also gives families a more structured outing. Bring water, sun protection, and shoes that handle damp sand and shell fragments. Follow all posted park rules, stay out of protected areas, and leave any shell occupied by a living creature exactly where you find it.
Shell Island
Shell Island earns its name for a reason. This undeveloped barrier island sits across St. Andrews Bay from the developed beach, and its quieter shoreline can reward visitors with a broader variety of finds. Because the island has limited services and requires a boat trip, it suits guests who want to make shelling part of a half-day adventure rather than a short walk between pool time and dinner.
Focus your search along the Gulf-facing side after low tide, then check the bayside if wind or water conditions make the Gulf side rough. The beach can hold sand dollars, scallops, whelks, and colorful fragments, though no location guarantees a full basket. Weather, seasonal currents, and recent foot traffic all affect what reaches the shore.
Plan carefully before you go. Boat schedules, water conditions, and access can change. Pack drinking water, sunscreen, a small mesh bag, and footwear. Do not remove live sand dollars, live shells, sea stars, or any other living marine life. Shell Island stays special because visitors treat it as a natural place, not a souvenir shop.
The West End and Laguna Beach Area
The west end of Panama City Beach, including the quieter stretches near Laguna Beach, can offer excellent shelling when the water settles after a storm or a period of stronger wave action. These beaches often feel less congested than the central resort corridor, which gives early risers more open shoreline to cover.
Search just after sunrise if your schedule allows. Freshly deposited shells tend to stand out before beach traffic spreads them, buries them, or carries them away. Walk slowly in a zigzag pattern between the wet sand and the wrack line. A shell that looks like a small pale stone at first glance may reveal a clean spiral or ridged edge once you pick it up.
This area works well for guests who prefer a simple, self-guided outing. You can combine a shelling walk with breakfast, a morning swim, or a relaxed day at your vacation rental. Check the tide chart before leaving. Low tide gives you more firm sand to cover and exposes areas that remain underwater later in the day.
Public Beach Accesses Away From the Busiest Blocks
You do not need a boat or a state park visit to find worthwhile shells. Many public beach accesses along Panama City Beach can produce good finds, particularly outside the most heavily traveled sections of the beach. The key is to adjust expectations. You may not find rare or perfectly intact shells, but you can still collect attractive scallops, small clams, coquinas, and distinctive fragments.
Choose an access with a broad shoreline and walk at least a few hundred yards in either direction. Concentrated shell deposits often appear in narrow patches where the tide has sorted material by size and weight. When you find one promising patch, slow down. The best shell on the beach may sit within a few feet of the first one you notice.
Time Your Shelling Walk for Better Results
Low tide gives shell hunters an advantage, but it does not work alone. The ideal conditions often arrive after modest wave action followed by calmer water. Strong storms can move shells onto shore, yet rough surf can also make the beach unsafe and scatter shells under heavy sand. Let the water settle before you search.
Morning offers another practical benefit: fewer people have walked the beach. During busy travel periods, guests who start early often find more intact shells than those who begin in the afternoon. If an early start does not fit your vacation schedule, try the hour before sunset. The lower light can make glossy or pale shells easier to spot against darker wet sand.
Avoid searching too close to the water during periods of high surf. Waves can pull adults and children off balance quickly, especially around steep drop-offs. Keep younger shell hunters within reach, and watch the Gulf as often as you watch the sand.
What to Bring - and What to Leave Behind
A small mesh bag works better than a plastic grocery bag because it lets sand fall away as you walk. A reusable container protects fragile shells once you return to your rental. Water shoes help on shell-heavy sections, while a wide-brimmed hat and drinking water make a longer search more comfortable.
Collect selectively. Choose a few shells with distinct color, shape, or personal meaning instead of taking every fragment you see. Never take a shell with an animal inside it. A live whelk, hermit crab, or other creature needs that shell far more than a visitor does. If you cannot tell whether a shell is occupied, set it down gently and move on.
Also respect posted local, park, and wildlife rules. Regulations can vary by location and can change, particularly in protected areas. Leave dunes, nesting areas, and marked habitats undisturbed. Do not dig into dune vegetation or remove natural materials from areas that prohibit collection.
Make the Hunt Part of Your Beach Stay
Shelling gives families a reason to slow down and see the beach differently. Children often enjoy sorting finds by color or shape after the walk, while couples may prefer a quiet sunrise stroll with a small collection pouch in hand. Rinse your shells with fresh water, let them dry fully, and choose a few favorites to display or use in a simple vacation memory jar.
The best shelling day rarely comes from chasing a perfect list of finds. It comes from arriving at the right stretch of shore, giving the tide time to do its work, and leaving enough behind for the next beach walk to feel just as full of possibility.
12 Best Panama City Beach Activities for a Great Trip
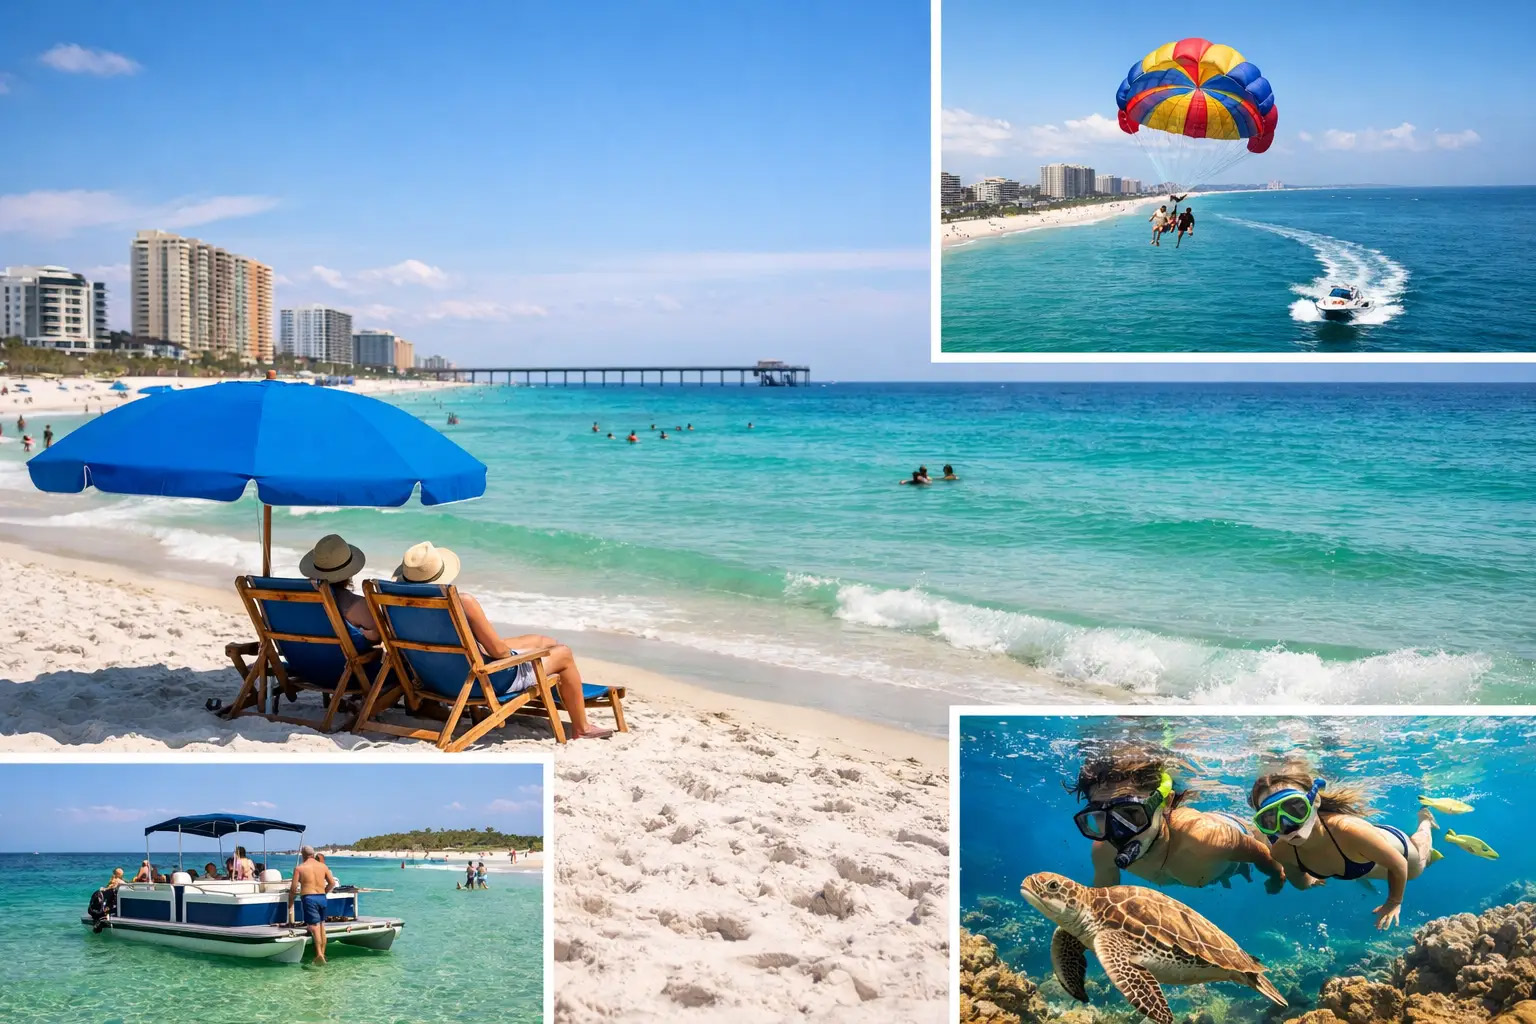
The Gulf sets the pace of a Panama City Beach vacation. One morning may call for quiet sand, clear shallows, and a long walk at the waterline. The next may bring a boat ride, a nature trail, or an afternoon that keeps children happily occupied out of the sun. The best Panama City Beach activities give travelers those choices without turning a relaxing beach stay into an overplanned schedule.
A strong itinerary starts with location, weather, and the people traveling with you. Families often benefit from pairing one active outing with a slower beach block each day. Couples may prefer sunset plans, a scenic park, and a dinner reservation. Guests who bring fishing gear, paddleboards, or bikes should choose a rental location that makes those interests easy to reach.
How to Plan Your Beach Days Well
Check the beach flag system before entering the water. Gulf conditions can change quickly, and a beautiful day can still bring strong currents or rough surf. Keep a close eye on children at the shoreline and also at the pool, use designated access points, and respect all posted signs & warnings.
Summer crowds, school-break traffic, and seasonal weather also shape the experience. Book popular tours early if you are traveling during peak periods, but leave room in your schedule for an unhurried morning at the beach. Panama City Beach rewards visitors who balance planned activities with time to simply enjoy the sandy white beach.
Best Panama City Beach Activities by Vacation Style
1. Build a Proper Beach Day
A beach day deserves more than a quick stop between other activities. Set up early with shade, water, sunscreen, and enough snacks to cover you for the planned time on the sand. Spend the morning swimming when conditions allow, search for shells along the wet sand, and take a long shoreline walk before the heat builds.
For many guests, this remains the best use of a vacation day. It costs little, works for nearly every age, and creates the unstructured time that makes a Gulf Coast trip feel like a real break.
2. Visit St. Andrews State Park
St. Andrews State Park offers a more natural setting than the busier central beach stretches near condos and other vacation rentals. Visitors can walk trails, look for shorebirds, fish from designated areas, see the alligators and enjoy views where the Gulf meets St. Andrews Bay. The park gives families and nature-minded travelers a great way to get in touch with the local scenery.
Bring shoes suitable for walking, drinking water, sunscreen, and a camera or binoculars. Conditions, hours, and access can vary, so confirm details before you go. This activity works especially well on a day when you want fresh air without committing to a full boat excursion.
3. Take a Shell Island Boat Trip
Shell Island is just across the water from St. Andrews State Park and delivers the uncrowded, open-coast feeling many visitors picture before they arrive. Boat trips can provide access for shell collecting, swimming, and viewing the dunes and protected shoreline from the water.
This outing depends on weather, water conditions, and operator schedules. Pack sun protection and water, and expect limited amenities on the island itself. Guests who want a quieter beach experience often find that the extra planning pays off.
4. Paddle a Kayak or Stand-Up Paddleboard
Paddling lets you experience the water at a slower, closer level. Calm bay waters often suit beginners better than the open Gulf, especially for families or anyone trying a board for the first time. A kayak also gives younger children a way to join the outing with an adult.
Choose protected water on windy days, wear a properly fitted personal flotation device, and stay aware of boat traffic. Rentals and guided options can simplify logistics, while experienced paddlers may prefer bringing their own equipment.
5. Book a Dolphin Tour
A dolphin tour adds excitement without requiring visitors to be expert boaters. Seeing dolphins travel, surface, and feed in their natural environment can become a standout family memory. The best tours focus on observation rather than pursuit, keeping a respectful distance from marine life. Remember that you should never feed the dolphins for your safety and theirs, too.
Morning trips may offer cooler temperatures, while later departures can provide softer light over the water. No operator can guarantee wildlife sightings, so treat the tour as a coastal experience first and a dolphin encounter second.
6. Fish From the Shore or a Pier
Fishing suits guests who enjoy a slower, focused activity and do not want a packed itinerary. Cast from the shore, a public pier, or a charter boat depending on your experience and goals. Pier fishing offers easy access and a social atmosphere, while a charter provides equipment, local guidance, and a chance to reach deeper water or quiet secluded bay locations.
Fishing rules, licenses, seasons, and catch limits matter. Confirm current requirements before you cast. If you book a charter, tell the captain whether your group includes beginners, children, or serious anglers so the trip matches expectations.
7. Spend an Afternoon at Shipwreck Island Waterpark
When the beach heat feels intense or younger travelers need a change of pace, a waterpark can solve the problem. Shipwreck Island Waterpark brings slides, pools, and family-friendly water play into one contained afternoon. It can also provide a useful option when the Gulf surf runs too rough for swimming.
Operating days and hours typically follow the season, so check the calendar before building your plans around it. Arrive early during high-demand periods, and reserve this activity for a day when your group wants high energy rather than quiet coastal time.
8. Walk or Bike Conservation Park
Conservation Park provides trails through wetlands, pine flatwoods, and quieter local landscapes. It offers a sharp contrast to condo towers, busy restaurants, and beach traffic. Walkers can choose shorter routes, while cyclists can cover more ground and settle into a peaceful morning ride.
Go early for cooler temperatures and better wildlife viewing. Wear closed-toe shoes, carry water, and prepare for bugs in warmer months. This is one of the best Panama City Beach activities for travelers who want to see more than the shoreline.
9. Browse Pier Park at the Right Time
Pier Park combines shopping, casual dining, attractions, and entertainment in a walkable setting near the beach. It works well on an arrival day, an evening after the sun, or a rainy stretch when outdoor plans need adjustment. Families can find enough variety to satisfy different ages without making several separate stops.
The trade-off is crowds. Peak evenings can feel busy, and parking can take patience. Go earlier if you want a calmer experience, or embrace the energy if your group wants an active night out.
10. Catch Sunset From the Sand
Sunset costs nothing, asks little, and consistently earns an important place on the itinerary. Bring a light layer, walk to a less crowded beach access point, and give yourselves time to settle before the color changes across the Gulf. The sky often shifts from bright gold to pink and violet in a matter of minutes.
Couples may make sunset the centerpiece of an evening, while families can use it as a simple wind-down after dinner. Keep the plan flexible because cloud cover determines the show.
Some travelers make it a point to meet on their beachfront balcony for sunset each evening for some quiet time together before dinner.
11. Plan a Beach Bonfire Through an Approved Provider
A permitted beach bonfire can turn an ordinary evening into a memorable gathering. The warm firelight, the sound of water, and a circle of family or friends create an easy setting for conversation after a busy day. Many guests choose this option for celebrations, reunions, or a final night by the Gulf.
Panama City Beach requires that you use an approved provider. Fire restrictions, wind, turtle-protection measures, and permit requirements can affect availability. Private fires on the sand are not allowed in PCB.
12. Take a Scenic Day at Camp Helen State Park
Camp Helen State Park brings together history, trails, lake views, and a less commercial edge of the coast near the western end of the area. Visitors can walk beneath shade trees, explore the grounds, and enjoy a setting that feels notably removed from the main beach corridor.
This choice fits travelers who like gentle outdoor activity and local character. Pair it with a relaxed lunch or a sunset stop nearby rather than trying to rush back for a full afternoon of beach time.
Leave Space for the Vacation You Actually Want
The most successful Panama City Beach plans do not try to check every box. Choose two or three priorities that fit your group, then let the weather and your energy level guide the rest. A professionally managed vacation rental from Emerald Beach Properties can give your group a comfortable base for those choices, whether the day ends with sandy feet at the door or a quiet evening after a park, pier, or boat trip.
How to Build a PCB Sandcastle That Lasts
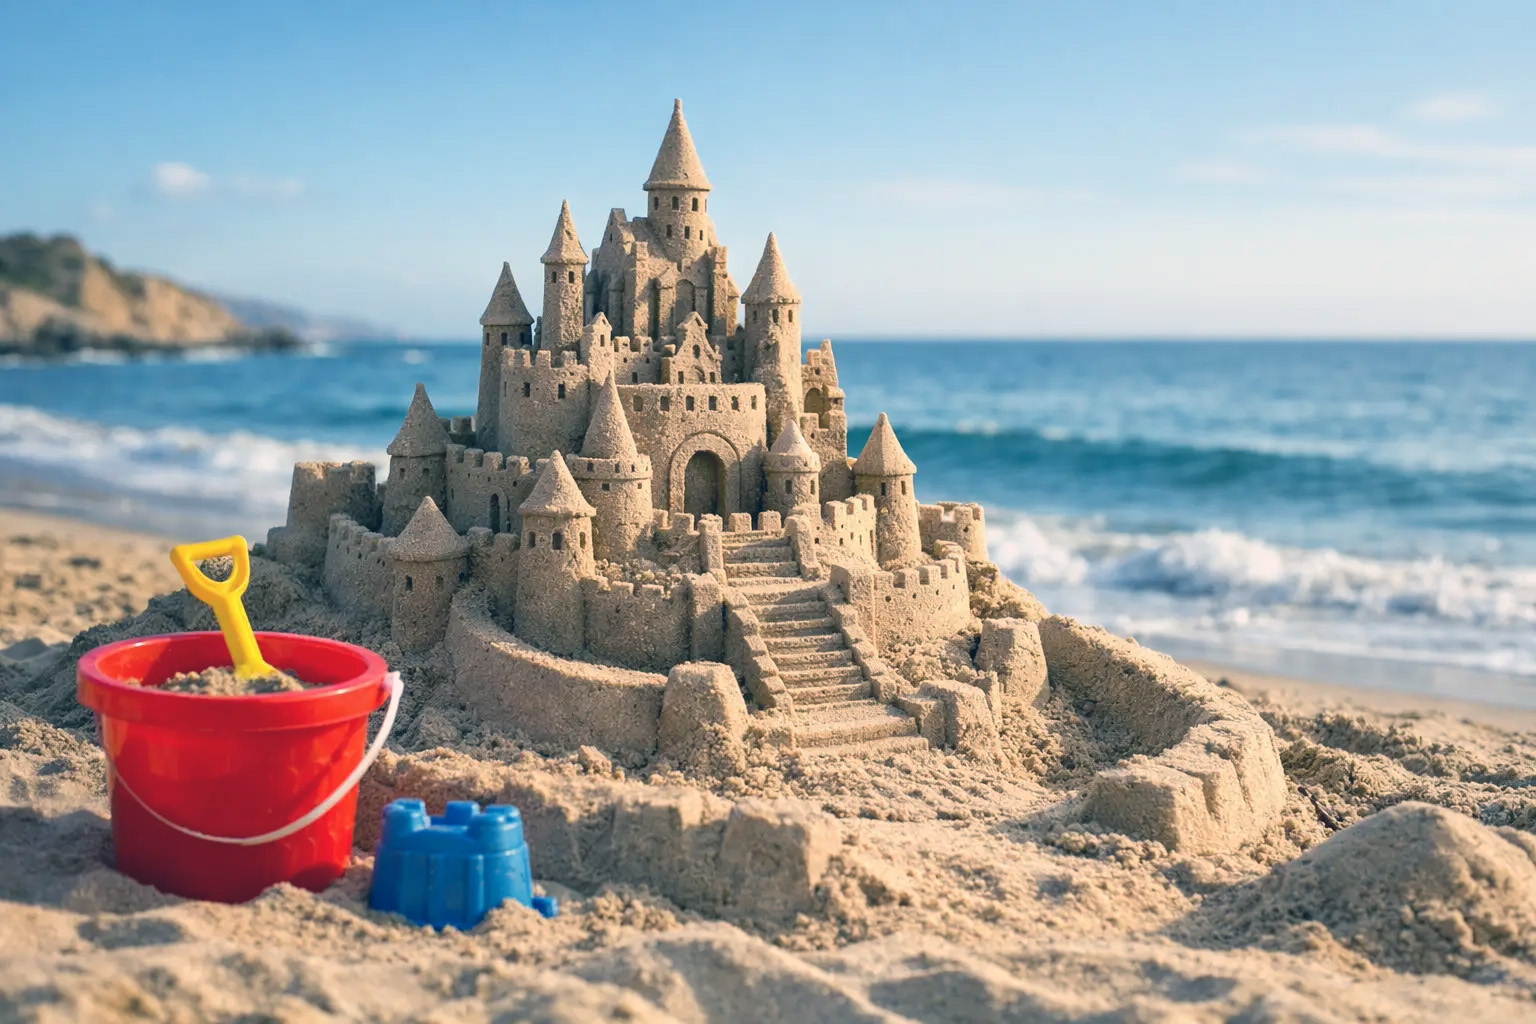
Emerald Beach Properties can help you find your perfect "sandcastle" in Panama City Beach, FL. Our vacation rentals are either beachfront or just a short walk to the beach so you can head on down and build a real sandcastle to make some amazing beach memories. Here are some tips for building that amazing sandcastle that will last!
A good sandcastle usually fails for one simple reason: the sand is too dry, the water is too far away, or the builder starts decorating before the base is stable. If you want to know how to build a sandcastle that actually stands up for more than a photo, the process matters more than the bucket size.
On beaches like Panama City Beach, where families can spend hours near the shoreline, sandcastle building is part activity, part engineering and a lot of creativity. The best results come from choosing the right spot, getting the sand-to-water mix right, and building in stages. Fancy tools can help, but they are not the deciding factor.
## How to build a sandcastle with a strong base
Start close enough to the water that you can carry wet sand without turning the job into a chore, but not so close that the next incoming wave takes out your work. Mid-beach is usually the safest choice. You want sand that is easy to wet and compact, with enough moisture to hold together when squeezed in your hand.
The base is where most castles are won or lost. A wide, packed foundation supports towers, walls, and carved details. If the bottom shifts or dries too fast, everything above it becomes fragile.
Begin by marking out a large circle, square, or mound. Then pile wet sand higher than you think you need. Compact each layer with your hands, feet, or the flat bottom of a bucket. Press firmly. Loose sand traps air, and air pockets lead to collapses.
A common mistake is pouring on water after the shape is already built. That can wash away edges and weaken the structure. It is better to mix water into the sand as you build, aiming for sand that packs densely without becoming soupy. If it slumps like mud, it is too wet. If it crumbles at the edges, it needs more water.
## The right sand-to-water mix
There is no perfect ratio that works in every condition because beach sand changes from one stretch of shoreline to another. With the soft, sugar white sands of Panama City Beach, the rule is simple: use more water than most people expect, then compact the sand thoroughly.
Wet sand holds together because a thin film of water forms bonds between sand grains. That is why dripping-wet sand can be easier to stack than damp, barely moistened sand. The trade-off is control. If the mixture is saturated, you need to let it settle before shaping it.
An easy field test works well. Grab a handful and squeeze. If it forms a firm clump and keeps its shape when turned out into your palm, it is ready. If it breaks apart, add water. If water runs out between your fingers, add more sand.
For families building with children, this is the stage worth slowing down for. Once the mix is right, the rest gets easier and more fun.
## Build upward in layers, not all at once
Tall towers look impressive, but height should come after stability. The strongest sandcastles are built from the bottom up in compacted sections. You can use buckets, cups, or simple hand-stacking methods.
If you are using buckets, fill them with very wet sand, tap the sides lightly, then invert them onto the base. Leave the bucket in place for a moment before lifting it straight up. Twisting usually damages the shape. For larger towers, stack the biggest forms first, then add smaller ones around and above them.
This is where patience pays off. Every new section should sit on fully compacted sand, not on loose decoration or uneven ridges. If a lower tier shifts even slightly, the upper portion may crack later, even if it looks fine at first.
For a classic castle shape, build one large central mound and place smaller towers around it. Connect them with thick walls instead of thin lines of sand. Thick walls are more forgiving, especially on warm afternoons when the surface starts drying quickly.
## Simple tools help, but technique matters more
You do not need a full sculpting kit to get good results. A bucket, a small shovel, and your hands are enough for a solid build. A few items can improve detail work, though. A plastic knife can cut clean edges. A plastic spoon can scoop windows and arches. A straw or small stick can define lines and drainage channels. Please don't take the kitchen utensils from your vacation rental to the beach to use for sandcastle building since you'll need them later for having breakfast, lunch or dinner. Pick up some disposable plastic utensils when you go out to eat for sandcastle building tools.
What matters most is how you use the tools. Cut downward with clean, controlled motions. Scraping too aggressively pulls grains loose and roughens the surface. When carving towers, start at the top and work down. That keeps falling sand from ruining finished details below.
Water is also a tool. Keep a small bucket nearby and use your hand to drip or pat moisture onto areas that begin drying out before you finish shaping them. A light touch works better than pouring.
## Carving details without collapsing the structure
The safest time to add detail is after the main structure is built and compacted. Do not rush into doors, battlements, and bridges while the base is still soft. At that stage, detail work often becomes accidental demolition.
Start with shallow cuts. Deep carving removes support, especially on narrow towers. If you want windows or arches, make them smaller than your first instinct. Sand can suggest detail without full cut-through openings. A shallow doorway often looks better and lasts longer than a tunnel.
For battlements, press evenly spaced notches into the top edge of a tower with a spoon or knife. For stone-like texture, stipple the surface lightly with fingertips. For a moat, dig it wide enough to be visible but far enough from the base that it does not undercut your walls.
This is one of those areas where it depends on conditions. On a cool, humid day, fine detail can hold well. Under strong sun and wind, simpler lines usually survive longer.
## Protecting your sandcastle from common problems
Even a well-built sandcastle is temporary, but a few decisions can extend its life. The first is placement. Avoid low spots where runoff or rising tide will reach the structure. Before you build, take a minute to watch the waterline. Beaches can change quickly, and a spot that looks safe at one moment may not stay safe.
The second is thickness. Thin walls, tall narrow towers, and deep undercuts fail first. If you are building with kids, thicker shapes are not just easier, they are more successful. The castle may look less delicate, but it will usually last longer and photograph better.
The third is moisture management. Drying out is often a bigger threat than waves. If the outer layer gets brittle, a small touch can crack the surface. Lightly re-wet exposed areas as needed, especially on hot afternoons.
Foot traffic is the final issue. Build far enough from walkways, chairs, and active game areas that your project is not in the path of a football, cooler, or distracted beach walker.
## How to build a sandcastle with kids
When children are involved, the best approach is to simplify the goal and make the process visible. Instead of aiming for a highly carved castle, focus on one large mound, a few towers, and a moat. That creates quick wins and keeps attention from fading before the structure takes shape.
Give younger kids jobs that match the build sequence. Carrying water, filling buckets, packing sand, and [placing shells](https://emeraldbeachproperties.com/blog/shelling-modern-day-treasure-hunting/) are useful tasks. Older kids usually enjoy carving and design choices once the structure is stable.
It also helps to set expectations early. A beach build is not permanent, and that is part of the appeal. The point is to make something impressive, enjoy the process, and get the picture before nature edits the work.
For families staying on or near the Gulf, sandcastle time can become the easiest part of the day to organize. It does not require reservations, screens, or much equipment. Just a little planning and a willingness to build the base correctly.
## A better sandcastle result with less frustration
The difference between a collapsing pile of sand and a satisfying castle is usually not talent. It is location, moisture, compaction, and sequence. Build where the sand is workable, make the base wider than you think necessary, pack every layer, and save detail work for the end.
That approach is practical, repeatable, and forgiving enough for a family beach day. If your first version leans a little or loses a tower, adjust the mix and rebuild. Sand rewards patience more than speed, and that is part of what makes the finished castle worth the effort.
And don't forget to make that photo of your masterpiece before you go in from the beach. It may not be there when you come back!
Shelling, Modern Day Treasure Hunting!
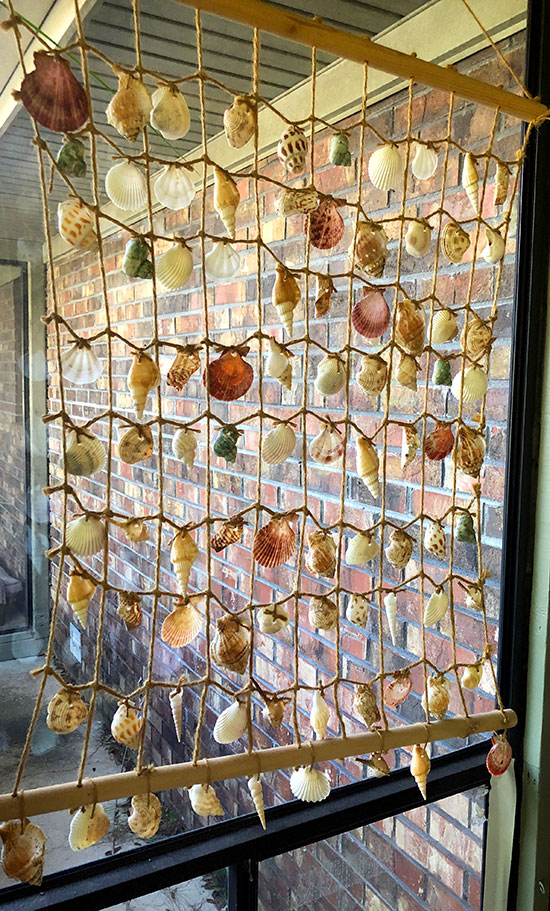
Shelling is the original treasure hunting and is enjoyed by people everywhere! Delicate seashells are like tiny washed up treasures. Enjoy beachcombing on Panama City Beach while you are here on vacation. The shells you’ll see vary from day to day so, it’s always an adventure. You can amass a treasure trove of real beauties while you enjoy your beach time. Some are snowy white and others are very colorful. You never know what you’ll find.
All you need is a mesh bag or other suitable container for carrying your shell stash and some free time to roam the water’s edge!
Remember to please inspect each shell before dropping into your bag, because it is illegal to take live shells from the beach.
For an extra special shelling experience, we highly recommend a trip to Shell Island, Panama City Beach, Florida. This secret spot is where the locals go for shelling an for taking a day off! Take a shuttle, rent a pontoon boat or a jet ski and head out to Shell Island, a tiny oasis that is perfect for when you want to get away from it all. This untouched beach area is mostly undeveloped and remains unspoiled so, you’ll find plenty of seashells to collect in addition to enjoying a day of swimming, snorkeling and beachcombing. Commonly found shells here are conch shells, junonia shells, tulip shells and spotted slipper shells.
Once you have your collection, you’ll want to display it in a special way. Here are some ideas for shell displays.
We wish you good hunting and luck finding some great shells while you are visiting us in PCB!
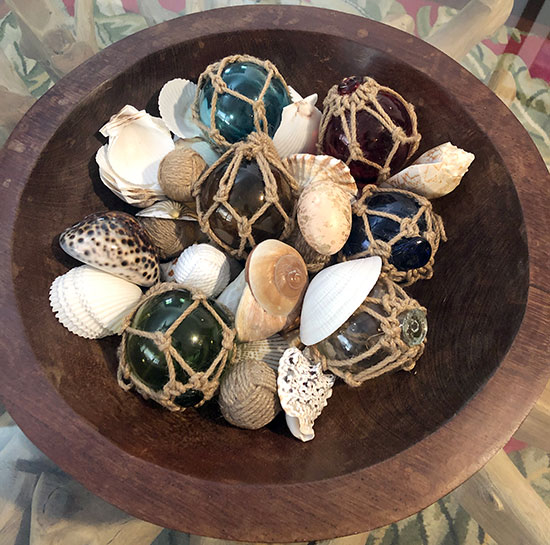
Display your Shell Collection in a Coastal Bowl with other beach items.
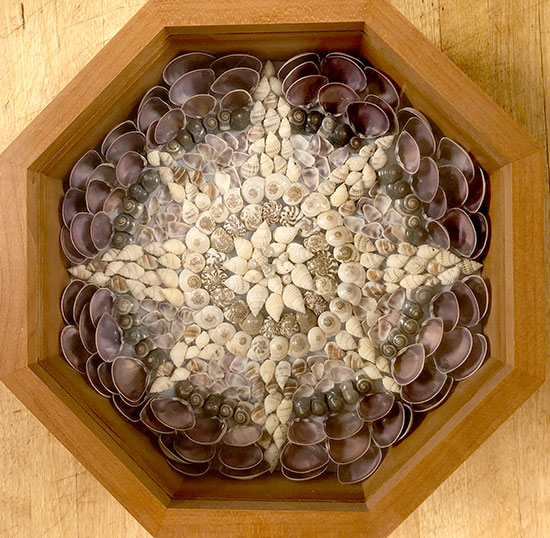
Use your Shell Collection to Make a Sailor’s Valentine for Your Sweetie!
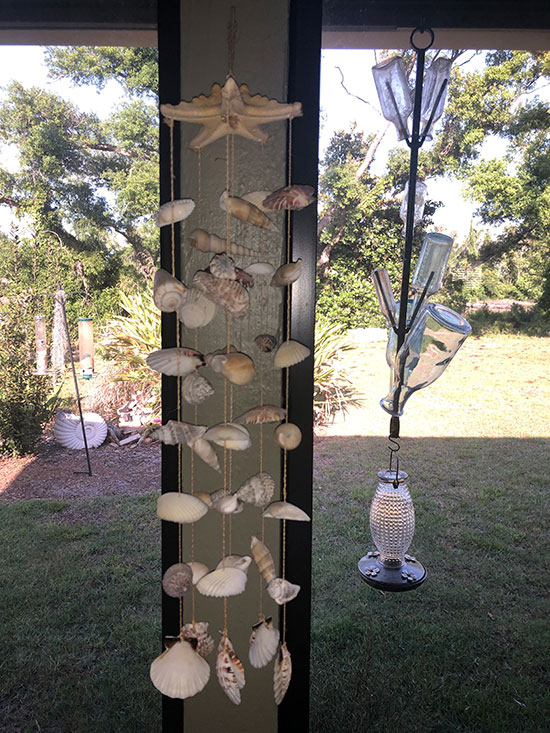
Make a Sea Shell Mobile or Wind Chime to Remind You of Your Time At The Beach!
A Shell Wall Hanging or Curtain Is A Special Memento Of The Ocean!